Showing posts with label affordable. Show all posts

Wednesday, May 9, 2018

Poshmark


Hello all!


Yes, I have been gone for quite a while but I am still alive and kicking! I will, in future posts, explain what has kept me away but for today we are talking about one of the many tricks that I have found to have nice things and get them for cheap! That's right, money saving tips!


If there is one thing that my family knows about me it is that I am good at finding expensive things for a cheaper price. Or taking something old and making it look new again, but more about this later as well! I am just so good at it that I think everyone should know my tips and tricks so this will be a series of blogs! And today we start with a website/app called Poshmark! Now just to clear the air, I am not sponsored by or influenced by Poshmark in anyway, shape or form! Now that that is out of the way, here we go!


Poshmark is an app/website that you can buy and sell used or new items, sort of like an online thrift store. You can find items anywhere from home decor to makeup to skincare to clothing and shoes. You can choose to buy with money from a bank account or credit card or, my personal preference, you can sell items on the site and you get basically like store credit to purchase other things on the site with. You can choose to request a check for the amount that you sold items for as well.


Tips for selling items successfully:


  1. Be truthful about the condition of your items! If you live in a home where smokers are, don't say that it comes from a smoke free home. The buyer might be allergic to smoke. And if you have dogs or cats, make sure to list in the description so. The nice way to do it would be to say "Comes from a pet friendly home". And always explain what condition the item is in such as using terms like: "Some wear and tear", "Has a rip", "Tag is missing", etc.
  2. Accurately state the size/color/shade of your items! I had experienced this exact situation myself. Everyone that wears makeup knows that you don't buy a foundation that isn't your shade if you can help it. I am the lightest of the light in shade and I asked someone what the shade of an item was (because she didn't list it in her listing) and she said it was the lightest shade and it in fact was not. If this does happen to you, Poshmark has an ability for you to return the item if it is not as described and get your money back.
  3. Packaging goes a long way!Even if it is a bottle of shampoo, wrap it in something. I at least wrap everything in tissue paper. If it's makeup then wrap it extra good, or if it is breakable! Some people go as far as to wrap the items like a present with a bow and all. And the notes people leave as awesome. It can be something as simple as a sticky note saying thank you, or a thank you card with a hand written message. It's like you bought yourself a present!
  4. Ship items on time!When your item sells, Poshmark automatically sends you a shipping label. Ship your items out in a timely manner! If someone doesn't ship the item in 7 days it does give you the option to cancel the order, which I have done several times. But the faster you ship, the more people will want to come back to buy from you again!

Tips for buying items successfully:


  1. "Like" items and watch them!When you find an item that you like but aren't happy with the price you have a few options here. You can "like" the item and it will go into a sort of "wish list" and when/if the seller ever lowers the price it will notify you. Then you can snatch that item up at a bargain!
    or
  2. Offer the seller a lower price!When you find an item you like there will be a button at the bottom that says "Offer". You can offer the seller a lower price for an item. Not all sellers will accept an offer but if it is an item that has been in their store a long time or they just want to get rid of it, then they may accept the offer!
    or
  3. Bundling!Bundling is a great option for SO MANY reasons! The main one being that you can get around the $6.49 shipping on everything...sort of. If I find an item that I really want and it is a good price I will ALWAYS look at the other items in their shop to see if they may have something else that I want. The reason being that you can by multiple items from 1 shop for 1 shipping price, whereas if you buy 2 items from 2 different shops, you will pay for shipping on each item! This is my favorite way of saving money on Poshmark!
  4. Leave strong feedback!This goes the same with any site like this, such as Ebay. Leave strong feedback for each seller that you buy from. I had someone leave me 4 stars instead of 5 stars because "my packaging wasn't good enough". I wrapped it in tissue paper!!! It was a shirt!!
  5. "Accept" your items as soon as you receive them!!!I can't even explain how it drives me bonkers when I ship an item to someone and the tracking says they have received it, but they haven't "accepted" the item. What I mean by that is there is this feature to Poshmark that is made to protect the buyer. It will not release the money for the item to the seller until you click on "Accept item" meaning that you have received it and it is in the condition stated in the listing. I under stand waiting a day...or even two. But when you have obviously received it and it has been 3 days...really? But lucky for us sellers, Poshmark has made a feature to cover us. If the item has tracked as delivered to the address and the buyer hasn't released funds after 3 full days, they release the funds to you on the 4th day. I personally "accept" items the day they arrive at my home.

And this concludes my tips and tricks for using Poshmark to get the most for your money! Hope you all enjoy and please don't hesitate to comment any questions! You can Click Here to go to Poshmark.com to check it out for yourself! You can also Click Here to check out my shop!

Happy saving!


Tuesday, June 20, 2017

Review on the Dermactin-TS Pore Refining Sheet Mask


I was at Sally Beauty Supply a few days ago to pick up some supplies to do my acrylic nails and noticed a sale they were having. It was sheet masks for 2 for $5. I love trying out new masks and since I was here I decided to grab a couple. I bought the Dermactin-TS Pore Refining mask and the Purifying mask.

A few days later I decided to try the pore refining one. I washed my face like usual and applied the mask to my face. This is a 2 piece mask, so you apply one sheet from your nose up and then one from your nose down. It says to leave on for 15-20 minutes so I left it on for 20 minutes.

Now I have very oily skin and large pores. There is not a single pore on my face that can't be seen ever. When I removed this mask I was in shock! There were patches of pores that were so small that you couldn't see them! And my larger pores were smaller! I couldn't believe it!

A few days later I tried the purifying mask and not only did it clean out my pores but it shrunk some of them as well. Not as many as the pore refining mask but it still visibly shrunk them!

So if you have large pores you need to try these masks! Even when they aren't on sale they are still only $2.99 a piece! And in the right hand bar I have placed a 15% off of your total purchase at Sally beauty. This should be able to be used online of in store! It is an affiliate code so I will make a small commission off of it.

If you enjoyed this blog review please do me a favor and follow using e-mail notifications for when I release new blogs! You can do that from the link on the right hand side of the page. Thanks and have a beautiful day!

Tuesday, June 6, 2017

Review on the Wet n Wild Photofocus foundation!

Yesterday I posted a new Youtube video! It is a review and wear test on the new Wet n Wild Photofocus foundation! I was pleasantly surprised by the quality of photos that I got from it, but had different feelings on how it looked in person. Check it out at the link below to see my thoughts and how it looked!

https://youtu.be/UGy8qgixhGI

Hope you enjoy this tutorial and feel free to comment on the video or on this blog with any comments/questions/concerns/suggestions! Have a beautiful day!

Thursday, June 1, 2017

Sally Hansen Airbrush Sun Tanner Review


I decided to try out the new Sally Hansen Airbrush Sun self tanner. I have tried the Jergens self tanner before and was not happy with the color pay off and that the tanner faded off in patches in less than 3 days. I saw a review on this tanner on Youtube and decided to try it.

I bought it at Walgreens and it was $14.99. Not too bad for a drug store self tanner but not cheap. They only had medium and dark so I bought medium.

I am very fair skinned, especially on my legs. But I just love the look of tanned legs. It makes them look so much more slimmed and defined.

Here is how I look without any tanner on.


So I didn't get to purchase a mit because nothing local to me sells them. I would have to drive to a Sephora or an Ulta to get them and we are talking like over 30 minutes to drive there one way! So on Pinterest I found this hack. Cover your hand with a grocery bag and then turn a really soft sock inside out and put it over top of the bag. And you have a mit!


The way I prep prior to applying self tanner is I take a shower and exfoliate my whole body but paying extra attention to my elbows, wrists, knees, ankles and feet. Then I put a heavy, creamy lotion on those areas only.

Then I pump 2 pumps at a time onto the mit and apply it to my body. I start from my legs and go up. I apply it in circular motions, avoiding my joints until I have almost nothing left on my mit and then going over those areas.


Now the color guard on this one scared me a bit because it is very gray. I really thought I was going to turn out gray! But I didn't.

When I got done applying this I waited about 5 minutes and it was dry. I did reapply it to my legs for a second layer because my legs are so much paler than my arms and I wanted them to match.

I put on some baggy pajamas and went to bed for the night. When I woke up in the morning I took a quick shower just to wash off the guard. I just used my normal gel body wash and a loofah.

And here you can see my after pictures!


I absolutely love the results! It looks so natural and like a sun kissed glow! I would definitely recommend this to anyone! I will be repurchasing it in the future!

If you enjoyed this blog review please do me a favor and follow using e-mail notifications for when I release new blogs! You can do that from the link on the right hand side of the page. Thanks and have a beautiful day!

Friday, May 19, 2017

DIY Starbucks Iced Chai Latte (Light Ice)

Today's blog is a DIY. I love the Iced Chai Latte from Starbucks and would get one everyday if they weren't so expensive. Well I now can have one everyday and sometimes twice a day without breaking the bank. I have figured out how to make this delicious drink at home and want to share it with you!

There is only 3 ingredients. Your milk of choice (skim, 2%, almond, coconut, soy, etc), ice, and chai tea concentrate. The Tazo Chai Latte concentrate is what they use in Starbucks and the brand that I buy. Now it can be a little pricey, at Walmart it is $3.28 for a 32 ox box. But you can purchase it at Costco for $7.99 for 3 of the 32 oz boxes.


You start with a glass and fill it about a third of the way up with ice. Now I prefer less ice in mine so you may want to put more if you prefer lots of ice.


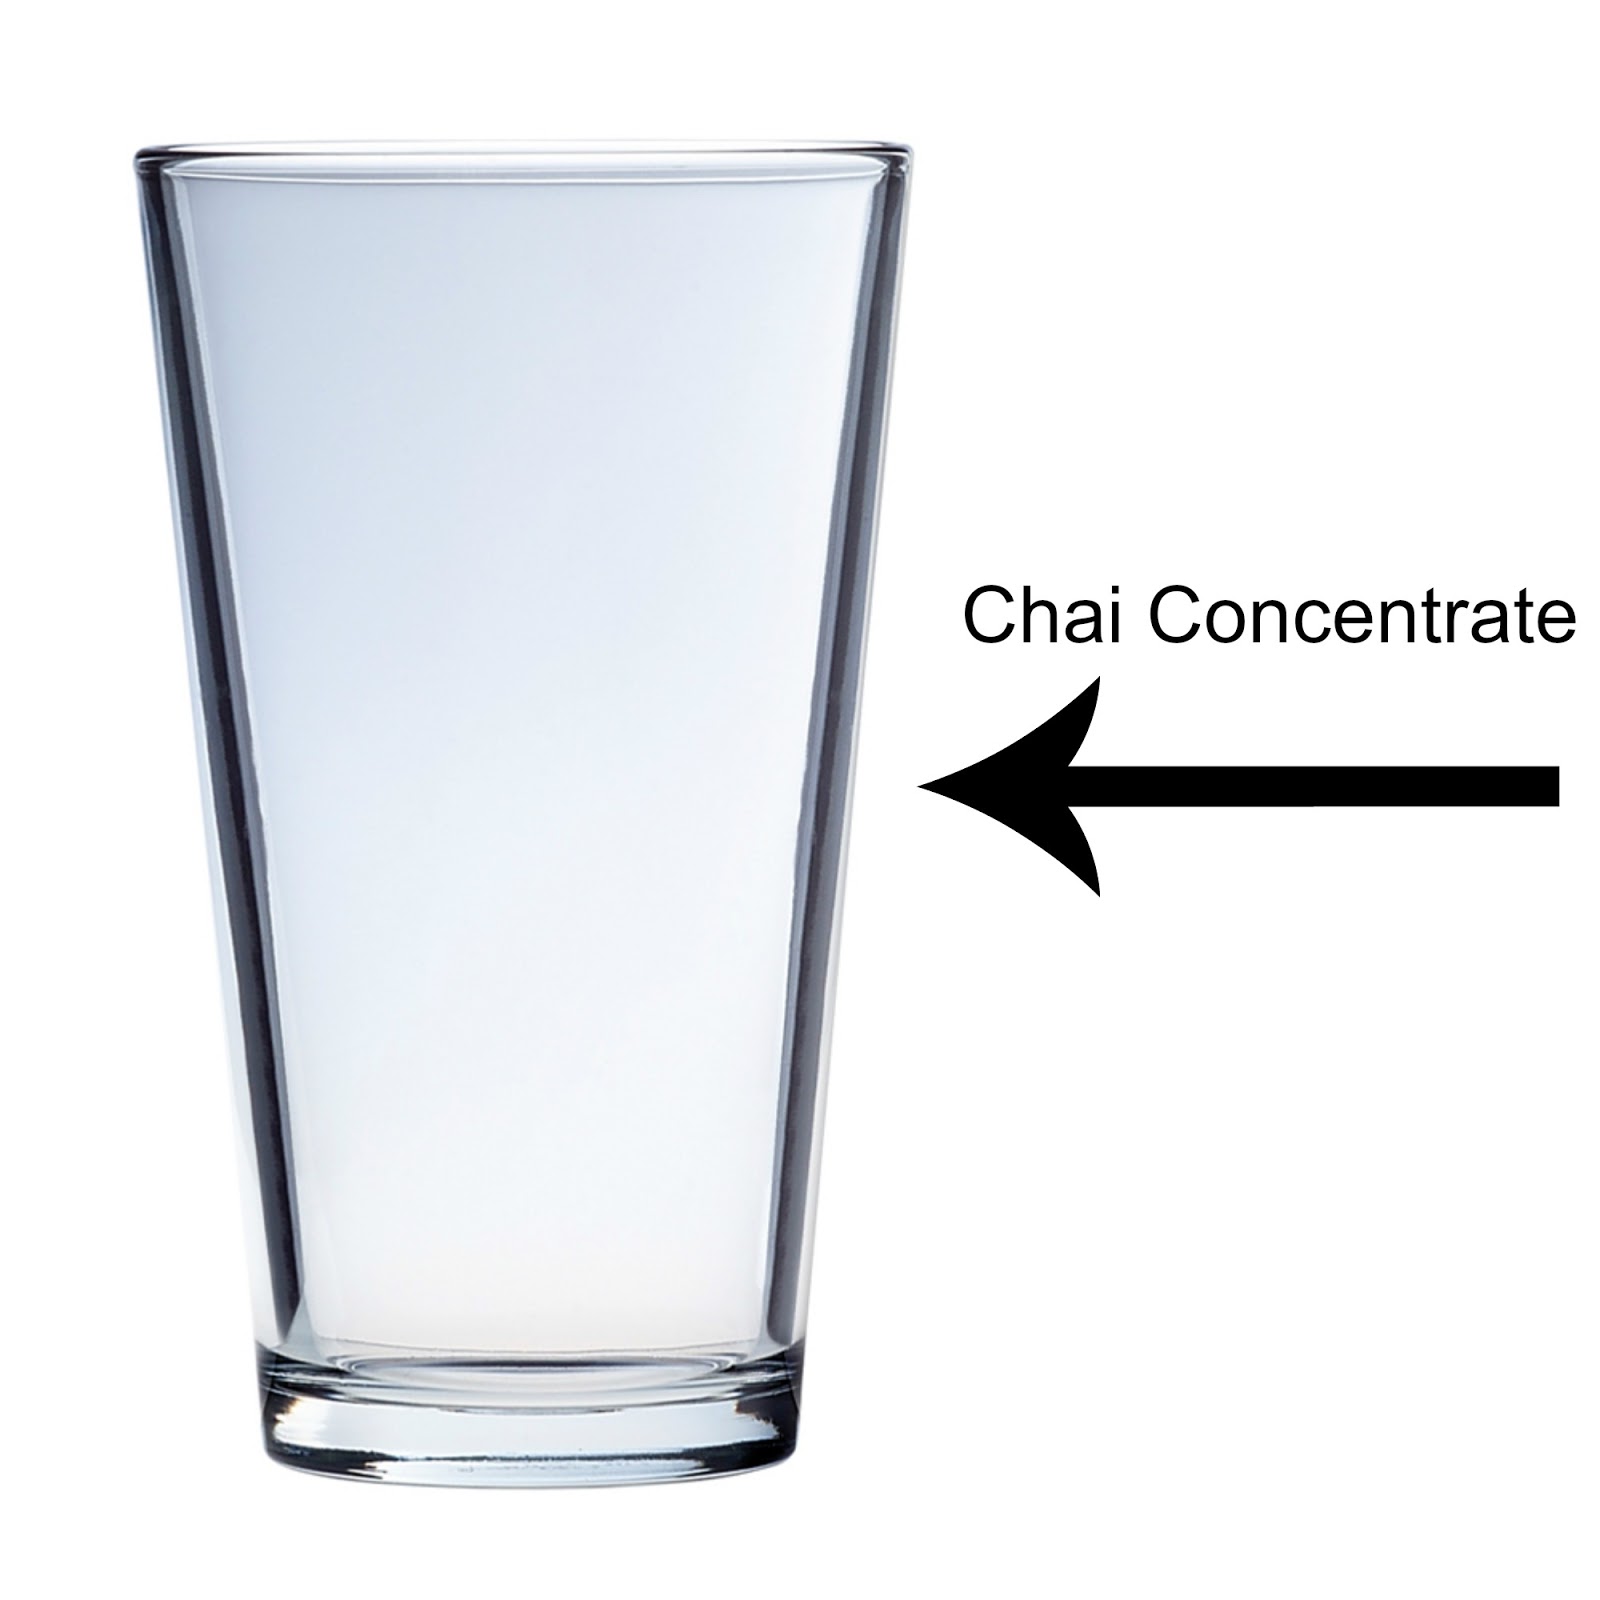
Next you fill your glass half way with your chai concentrate. You can adjust this to your taste. If you want the chai taste a little stronger than put more concentrate in it.


Then you top off the glass the rest of the way with your preferred milk. And then give it a stir and you have yourself a Starbucks quality chai latte! Yes, it is really that easy!


If you enjoyed this DIY recipe then please follow my blog for more DIYs. You can find that option on the right hand side of the page. If you have any other tips and tricks on making one of these please comment below. Thank you and have a beautiful day!

Friday, May 12, 2017

DIY Sign For A Mother's Day Gift


I decided to do a DIY project as a Mother's Day gift for my mom this year. I bought my supplies at Hobby Lobby and most of it was on sale so I only paid $16 for the supplies! Here is everything that I needed for the project.


I painted the entire board with white matte paint.


It wasn't quite as opaque as I wanted it to be so I gave it another coat.


I then took the sanding block and sanded the edges and between the boards to give it a weathered look.


I sketched on the design that I was going to paint on in pencil so if I made a mistake (as I often do) I could erase it.


Using a very thin paint brush I painted on the design in black matte paint.


I glued the flowers on using Gorilla Super Glue and this project is done! I think it turned out super cute and I can't want to give it to my Mom on Mother's Day! Hope you have a fantastic Mother's Day!!


Monday, May 8, 2017

DIY Mother's Day Bracelet


I decided to make my step mom a bracelet for Mother's Day this year. I got all of the "ingredients" at Hobby Lobby where it was all half off! This is what I got. Because it was half off I only spent $11.98!

I cut off a piece of the elastic thread about double the length that I wanted. Later on I decided that I wanted to double it up to make the bracelet stronger. 


I took everything out of the packages and separated it all. I started to set it all up in a pattern.


And strung it on the thread.


It wasn't long enough so added more.


Then I decided that I didn't like how clumped together it looked so I added an extra pearl between each rose gold bead. This is the finished pattern.


I then knotted it. It is really difficult to show knotting with just pictures so I am going to link to the Youtube video that I learned to knot from here. I did also add a drop of super glue to the knot as well. Be sure to hold the 

end beads apart while the 
knot dries so they don't glue 
together.


Trim the ends and you are done!


I decided to make a second one to match with the leftover beads.


Thanks for watching this tutorial and if you enjoyed this please do me a favor and subscribe to e-mail notifications for when I release new blogs! You can do that from the link on the right hand side of the page. Please comment with any thoughts or suggestions or if you would like to see more blogs like this one! Thanks and have a beautiful day!

Friday, April 28, 2017

Kokie Professional Nail Polish in Heavenly


I received this nail polish in my Ipsy bag. As I have said before, I don't usually use light colors but I have been enjoying this one! This shade is called Heavenly and I would describe it as a very pale blue/gray color.


The color pay off is very shocking! I can almost wear this with one coat, but there was a few streaks. 2 coats and it is completely opaque! I am very impressed! On the left is what it looks like with one coat and on the right is two coats.

According to the website you can purchase this at Wal-Mart and Bed Bath and Beyond and retails for $6. You can also purchase on their website here.


I usually add a coat of Beauty Secrets Top Coat to my polish. I will put updates on the longevity of the polish below! So far I am very pleased!

Please feel free to comment with any suggestions that you might have for me to try. And if you enjoyed this blog please subscribe to email notifications when I post more. You can find that on the right hand bar of this page. Have a beautiful day!

Wednesday, April 26, 2017

clariSEA Sea Salt Solutions Mask

Today we have a review on the clariSEA Sea Salt Solutions Deep Pore Detox Activated Charcoal Exfoliating Mask...that's a mouth full! I received this in an Ipsy bag, though I can't remember which month it was. I love trying out new face masks! This product is all natural, paraben free, sulfate free, fragrance free, dye free, vegan friendly, gluten free, and cruelty free.


Charcoal masks are known for being good for acne prone skin because charcoal draws out the dirt clogging your pores. Cleaner pores = clearer skin! This is what my skin looked like after washing and before using the mask. Even after cleansing my skin the pores are not cleaned out, I still have several blackheads in my t-zone mostly. I typically use a knock off Clarisonic and that cleans out my pores better than standard washing, but for this review I did not do that so you could see the results of the mask alone.


So the instructions say to pour a quarter-sized amount into the palm of hand or a small bowl. Slowly add drops of water, while mixing, until a paste is created. Paint onto face in circular motions. Rinse off once dry. Exact: 1 teaspoon mask & 1/3-1/2 teaspoon water. The product is very light a fluffy until you add water and it turns into a mud like consistency. So I mixed it with water and applied it to my face. And this is how it looked.


When it had dried fully I used a warm, wet washcloth to rinse it away. It was easier to wash off than any other charcoal mask I have ever used. This is what it looked like after I removed all of the mask.

My camera quality is not fantastic but, in case you can't tell, a lot more of my pores are cleaned out than before. I would not call it a high quality mask but it definitely works. For the price, I think it is a fabulous deal. I think it is worth buying for sure. I might purchase it when/if I ever run out of masks to try.

You can purchase this item on their website here. It retails for $14 for a 2 oz bottle, which I would definitely consider to be drugstore pricing. Super affordable!

If you enjoyed this blog review please do me a favor and subscribe to e-mail notifications for when I release new blogs! You can do that from the link on the right hand side of the page. Thanks and have a beautiful day!