Today I posted an Eye Tutorial on Youtube. I absolutely love this look! The star of the show is the Naked Cosmetics Eye Pigment in Desert Sunset 02. You can purchase this pigment through the link in the right hand bar of this page. This is an affiliate code that I do make commission off of. Feel free to purchase from somewhere else if you do not feel comfortable using an affiliate code! Here is a link to the Youtube Video:
Hope you enjoy this tutorial and feel free to comment on the video or on this blog with any comments/questions/concerns/suggestions! Have a beautiful day!

Showing posts with label mascara. Show all posts
Showing posts with label mascara. Show all posts
Saturday, June 3, 2017
Friday, May 5, 2017
Purple Eye Look

Today I am doing a tutorial on this purple eye look. Without further adieu, here we go!

 I am starting with my face makeup on and nothing else. And I am starting out on the right foot with an upside down picture of my eye primer that I used! I use the Urban Decay Primer Potion. I also dust a little RCMA No Color Powder over top to make the eye shadows blend over top easier.
Then I curl my lashes.


I started out with this shade in the Morphe 35O palette and this SLMissGlam L34 Blend Beauty brush.
 Now I am going to use this shade as a transition shade and blend this into the crease using small circles and windshield wiping motions.

Now I am going in with this shade of the same palette and this Wet n Wild brush.


outer third to give it some depth.

shade in the Morphe 35B palette and this ELF Eyeshadow "C" brush.

I packed this shade onto the lid until I had the color payoff
that I was looking for to set and under tone for the top shade.


Now with the same brush I am taking
this medium purple shade from the same palette and packing on the outer half of the eye.


Now I am taking the dark purple shade directly below that with this Vera Mona brush and applying it to the outer third of the eyelid.

 Using the same brush and L'Oreal
 Infallible Eye Shadow pressed pigment in shade Purple Priority I first attempted to apply it by spraying my brush with some setting spray but I couldn't get it to apply across the lid, it just clumped up in one spot.

I then used my finger to apply the shadow and it applied much better this way.

 I then took my favorite water line eye liner, the Maybelline Eyestudio using the brush that comes with it. I feel like when other people show a picture lining their water line they look so much more graceful than me.

And today I am trying out a new eye
liner. This is the Absolute New York Nano Liner.


And our wings are on!


I then took this shade in the Morphe
35O palette to highlight my inner corners.


I did step outside of my normal holy grail mascara and used my old favorite, the Too Faced Better Than Sex mascara. This is one eye done and one eye not.
I'll even let you in on a little trick of mine. To keep my mascara from bleeding throughout the day. I dust a little RCMA No Color Powder with a fluffy brush under my bottom eyelashes!

And here I am deciding what color lips to do with this look.


I decided on using the NYX
retractable lip liner in shade Sand Beige to line and fill in my lips.


And then I used the NYX Soft Matte Lip
Cream in shade San Paulo.
And here is the finished look! I absolutely look these colors with my blue eyes! Thanks for watching this tutorial and if you enjoyed this please do me a favor and subscribe to e-mail notifications for when I release new blogs! You can do that from the link on the right hand side of the page. Please comment with any thoughts or suggestions or if you would like to see more blogs like this one! Thanks and have a beautiful day!

Monday, May 1, 2017
Blue Smokey Eye Look

Hi there beauties! Today I am actually doing a full face makeup look. This is my first time doing one on my blog and most of this type of look that I have seen have been on Youtube. Which, by the way, I am debating on starting my own channel. Give me your thoughts on that in the comments blow! Or you can go to my Contact Me page and get a hold of me there!

So here we go! This is my go to face routine. I have already washed and moisturized my face using my Paula's Choice products. And here is my beautiful, clean bare face!


 I primed my face using 2 different primers. I started with my Artistry Exact Fit Beauty Balm Perfecting Primer. It smooths out my pores and skin tone and gives a subtle glow to the skin. And then I followed with my Make Up For Ever Step 1 Mattifying Primer. I only put this in my areas that get oily and it helps to keep me matte throughout the day. I have a few spots that get a little dry and this stuff is so good at mattifying that it will make those spots dryer if applied there. And this is what my primed face looks like.
And then, of course, my furbaby Wally has to come in a make his photo bomb appearance! It wouldn't be a true blog for me if one of my furbabies wasn't in a photo!


 |
| And here is my very concentrated while applying my color corrector face. |
 |
| And then the finished color correcting product. |

Now I will apply my all time favorite foundation! The Make Up For Ever Mat Velvet foundation in shade 15, which is the lightest shade they have. Shout out to all my pale princesses out there!

I like to dot it on my face one section at a time and then stipple it on using a very dense brush like this ELF one. I feel like I get the most coverage this way.

And like magic, I am flawless! It is the perfect shade for me, it is high coverage without being cakey and uncomfortable. I love this stuff!


And now I use the Tarte Shape Tape concealer in shade fair to conceal under my eyes. This stuff is the best at concealing my dark under eyes without creasing.
 |
| And here we are, concealed to perfection and set using the RCMA No Color Powder. |
And, for some reason, I didn't show my contouring, highlighting or blush. Not sure what happened there so we will just move right along...

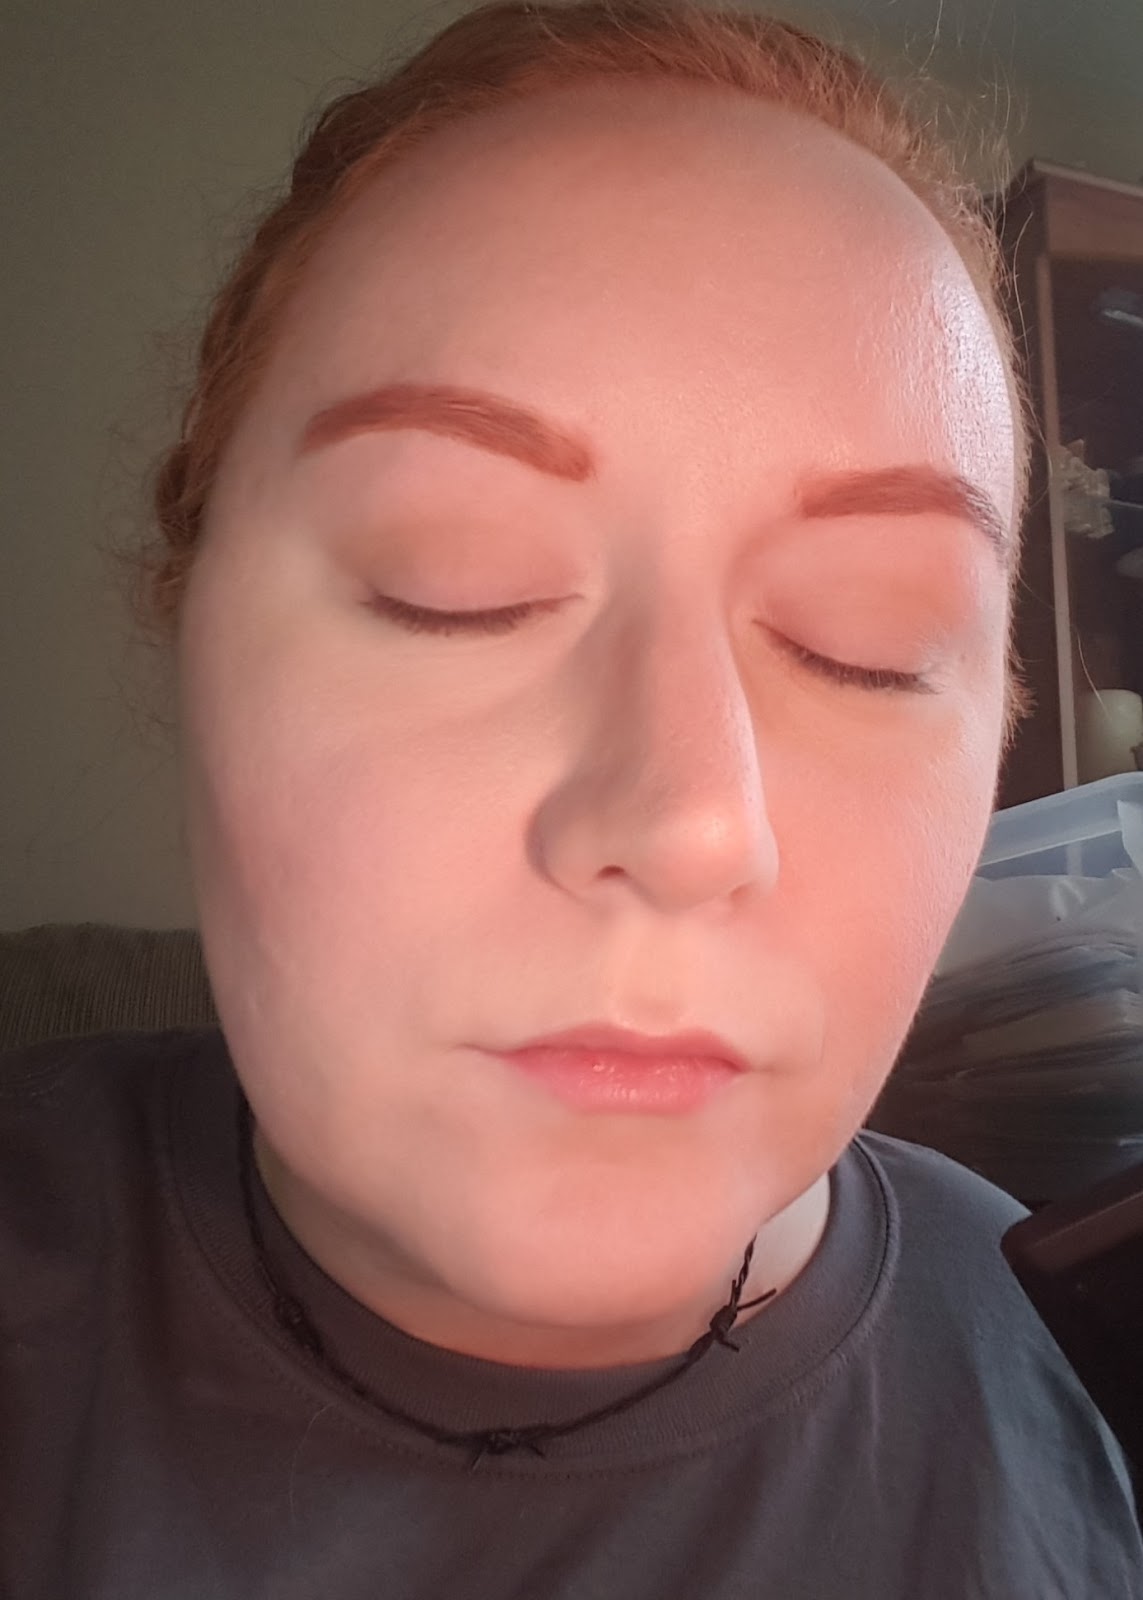
 |
| I did my brows using the Anastasia Beverly Hills Brow Wiz in the shade Auburn. They might look kind of crazy but they look better when my whole face is done! |


Then I went in with the L'Oreal Infallible eye shadow in the shade Timeless Blue Spark all over the lid.

I then placed some of the shade Sytry from the Shade and Light palette in the outer V to darken it up.

I then used my Maybelline Eyestudio gel liner and lined my top and bottom water line and smudged it out a bit.
Then I used my holy grail mascara: the Younique Moodstruck 3D Fiber Lashes. That made my eyes go from a little bit of a blue pop to hello bright blue eyes!


And that completes this look! If you enjoyed this blog please do me a favor and subscribe to e-mail notifications for when I release new blogs! You can do that from the link on the right hand side of the page. Please comment with any thoughts or suggestions or if you would like to see more blogs like this one! Thanks and have a beautiful day!

Subscribe to:
Comments (Atom)